

![]() OPMERKING: lezers kunnen hier onze Nederlandstalige recensie lezen hier...
OPMERKING: lezers kunnen hier onze Nederlandstalige recensie lezen hier...
We present a quick review in English of the....
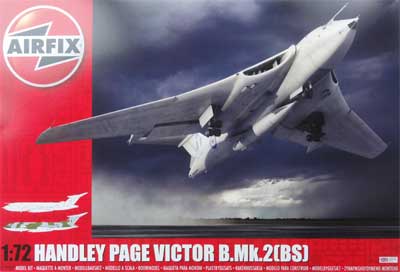
Model: Airfix Victor B.mk 2 (BS)
This brand new kit Airfix was released in December 2016. Of the V-bombers, Airfix released in 1/72 scale an injection molded kit of the Avro Vulcan way back in 1983, followed in 2011 by a nice kit of the Vickers Valiant. An injection molded kit of the Handley Page Victor K2 tanker version was released in 1/72 by Matchbox in 1983 and a decade later reboxed and released by Revell in 1993 using the same molds and still for the K2 tanker version.
History
The development of the Handley Page Victor began late forties and the Cold War was a reality. The British Royal Air Force came up with a specification for bombers who were able to drop British nuclear bombs. This would lead to the development of a series of jet bombers, the so-called V-bombers: Valiant, Vulcan and Victor. The Handley Page company made a design to this specification as project HP.80. Later called the Victor the prototype first flew late 1952. The aircraft had a conventional shape with a horizontal tail and big wing root section to contain four jet engines. Because of the required high subsonic speed "some area ruling" was applied that was becoming understood in this period so incorporated in the design to avoid high drag at the maximum speed of 1000 km/hr at high altitude. The cockpit was to accommodate a crew of 2 pilots on ejection seats with an additional 3 crew members aft such as navigator on normal seats with provision for an additional trainer or observer seat. The aft crew was supposed to bail out in case of an emergency through the entry door. The Victor design also got the biggest bomb bay of all V-bombers and a special feature was the horizontal tail with a large dihedral. Following testing, the basic design required considerable modification.
The first production version of the Victor was the B.mk 1 (or B1 in short) fitted with four Sapphire engines. This went into production with a first aircraft making its public appearance in mid 1956 and some 50 B1 Victor aircraft manufactured. The primary weapons were the Grand Slam or Tall Boy bombs but also the Blue Danube nucleair bomb. Extra fuel tanks could also be installed in the bomb bay. The RAF Victors were not used only in England but also occasionally sent overseas such as to Singapore and to do training and testing in Australia at the Woomera range. In 1962 a modification program was started and the B.1A got updated systems, an in flight refuelling probe and the outboard wing areas also modified with a fixed slightly drooped wing leading edge with a small saw-tooth notch (replacing the earlier slat).
The Royal Air Force also wanted to fly higher on missions and that required more powerful engines. The design was adapted and the Victor B.mk 2 or B2 was fitted with Conway engines that required a larger wing root section with larger air intakes. This resulted, together with a longer wing tip into a 10-foot (3 meter) increased wing span. About 34 Victor B2 aircraft were built. A further development was the need to deploy the big "Blue Steel" missile with a nuclear warhead. This missile was to be dropped from the Victor, fired and then to fly at MACH 1.6 over a considerable distance to the target 200 NM away. This special Victor B2. (BS) version carried the Blue Steel missile in a fairing in the lower bomb bay.
A B2 retrofit program was also soon started with an upgraded Conway engine. Also a special "Whitcomb body e.g. Kuchemann Carrot" fairing for lower drag was mounted below each wing halve trailing edge. The outboard wing areas were also modified with a fixed slightly drooped wing leading edge with a small saw-tooth notch (replacing the earlier slat, similarly to the B.1A). The first modified B.2R was ready August 1963. The Blue Steel was still the primary weapon. Usual finish was “anti-radiation” overall white but later on for more conventional missions often flown at lower altitudes the camouflaged schemes were introduced.
Some B.2 Victors were in the mid sixties also modified for the strategic reconnaissance role under designation B.(SR)2 or later SR2. Various cameras could be fitted in the bomb bay along with additional fuel tanks.
The nuclear bomber mission soon became unnecessary as the British nuclear deterrent force were to use submarines equipped with American Polaris missiles. The deterrence task of the V-bombers therefore shifted in the late sixties to other tasks. Of the V-bombers the Avro Vulcan would continue to serve as a conventional bomber. The few Valiants were already converted as air refuelling tanker but the type was soon withdrawn from service due to fatigue. It was decided that the many Victors were to be converted for the air refuelling tanker role. So some 8 Victor K1 tankers based on the B.1A and also some 24 K2 tankers based on the B.2R were converted. The tankers were given special pods under the wing and a lower fuselage fairing for the "hose and drogue" refueling system. The first Victor K2 tankers entered service in 1975 and the type flew until 1993 with the Royal Air Force. They were also seen regularly at European air shows and made quite an impression with those prehistoric looking shapes! (Note that Matchbox – Revell offered the Victor K2 tanker as kit in 1/72 scale).
The new Airfix kit
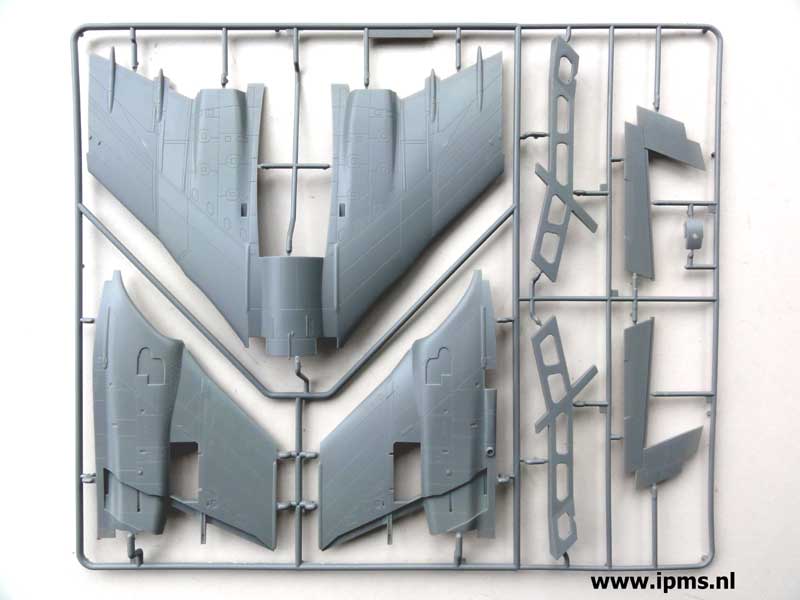
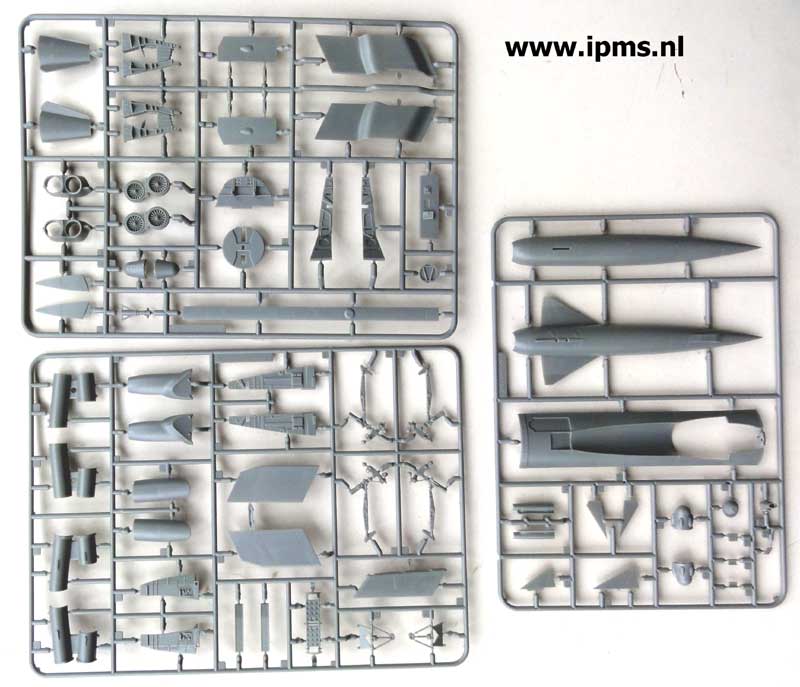
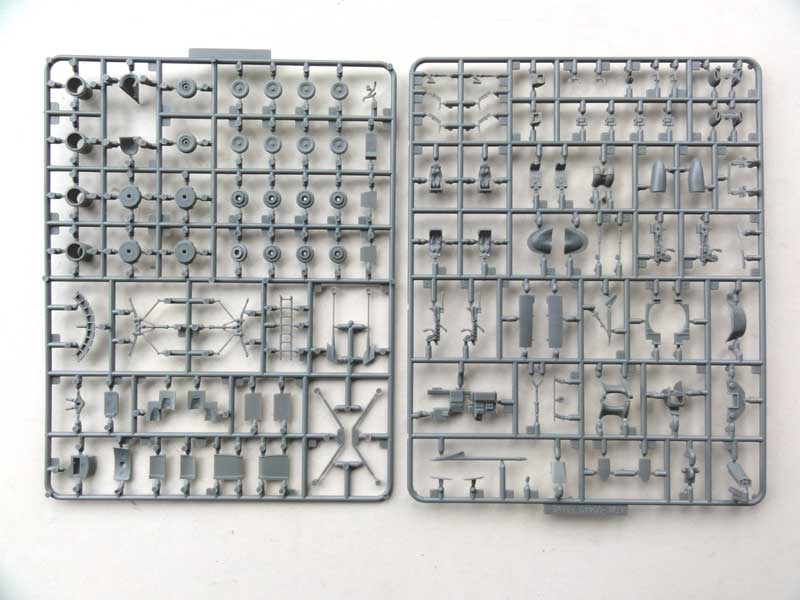
The Airfix 1/72 scale kit is for a Victor B2.(BS) with the Blue Steel as flown in the nineteen sixties. The kit contains approximately 215 fine parts in medium grey plastic and a number of transparent parts.

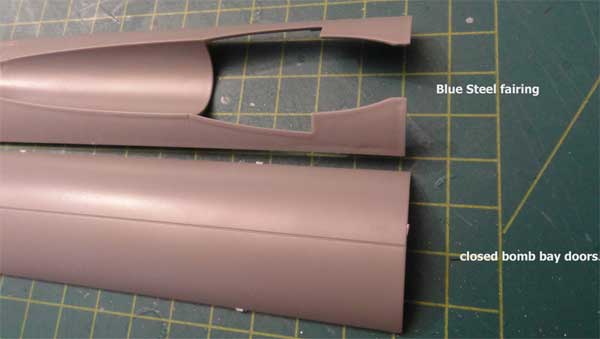
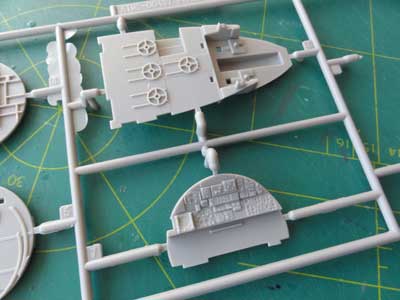
Note here below also the bomb bay and doors.... A closed doors part is also included and also the door actuators no.18 and deployed bomb bay spoilers no.19 are in the kit (but not used for included kit schemes)
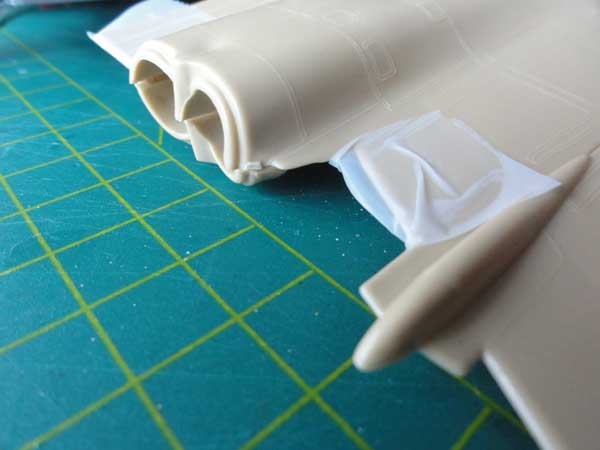
The transparant parts are pretty thin and the longer B2 wingtips are also provided as transparant parts to contain wing tip anti-collision lights, but there is a plastic flow bit on this section.... so remove carefully!

The Airfix instructions show an incredible 129 building steps with some extra colour printing for clarity. The instructions must be carefully studied because there are choices to be made requiring also various drilling of holes. The colours of the components are shown but unfortunately only in Humbrol colour numbers. (See extra colour table in this article).

The kit is great in detail and accuracy (see appendix below in this article). The details such as in the cockpit are very good. The panel lines are neatly engraved and although somewhat deep in places will look good under a layer of paint. The undercarriage bays are neatly detailed and have usually an aluminum colour inside. The undercarriage gears are also fine and look strong enough. (No additional parts are provided for a wheels up model, but the doors can be converted for closed doors option).
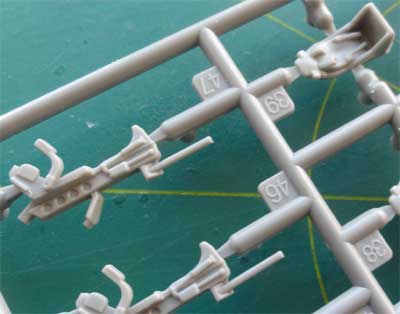
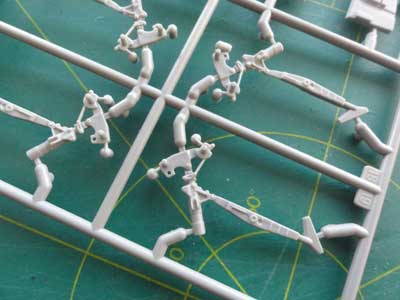
On the smaller parts there are many small "plastic flow bits" on the parts that need removal with a modelling cutter. Also, a razor saw is strongly recommended to separate the larger parts from the sprues. Some gates are on the mating edges, so these need some clean up as well.

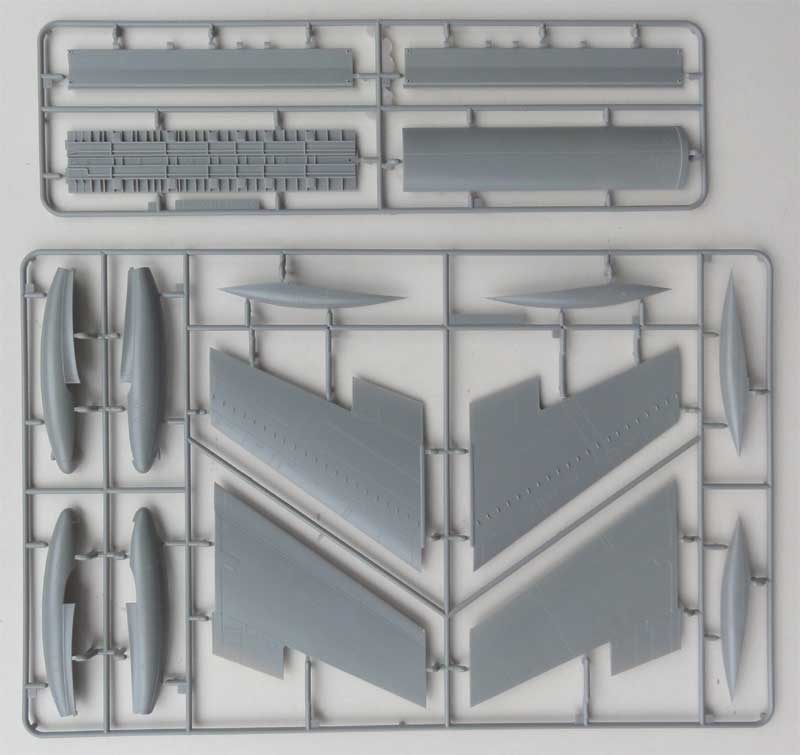
The basic kit structure consists of two fuselage halves with the vertical tail and separate wing halves. There are a few strong box like structures in the kit that provide the necessary firmness. The large flaps are separate parts and can be closed or set drooped down.
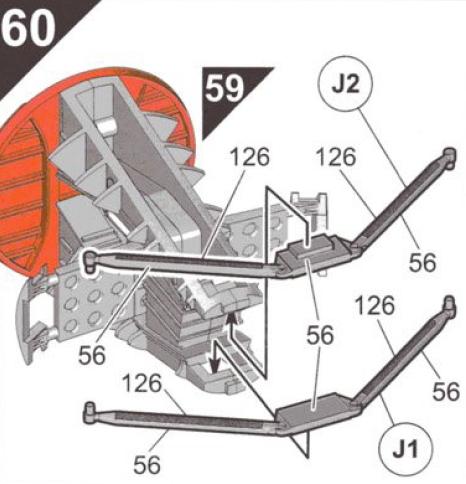
The rear fuselage air brakes are nicely provided and can be set closed or open. And certainly look good when displayed open. Tip: In part G17 (see step 56) the engraved lighting holes can be opened up with a handheld drill.

There are two choices at the rear fuselage with or without ECM fairings. Nice is also that indeed a fuselage bomb bay is provided with a separate fairing plate for the supplied Blue Steel missile. (The bomb bay itself is of no further relevance to the Victor B2. (BS) with Blue Steel. But the unused parts in this kit include also the loose bomb bay doors C1 and C3 that slide open upwards inside the bay; another big plate is also provided for a "closed bomb bay", very nice!).
 ..
.. 
Also there are separate wing slipper tanks as well as molded presumably Radar Warning Receiver antennas in the horizontal V-tail (see construction steps 17-18). These RWR bits should be sanded off for the provided kit schemes as indicated by Airfix. ( But the fact that these parts are in the kit suggests that Airfix can later offer other Victor kit versions. A few additional parts on a new sprue will do the job).
Schemes and decals
There are two color schemes available as per kit, and these are shown on a separate paper sheet in colour. The decals in the kit are very neat with a lot of detail stencilling. Their positions are also shown on a paper sheet.
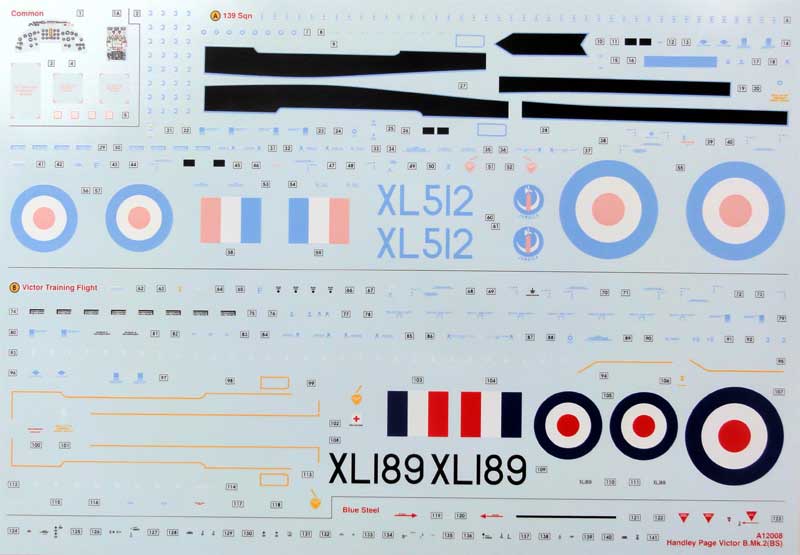
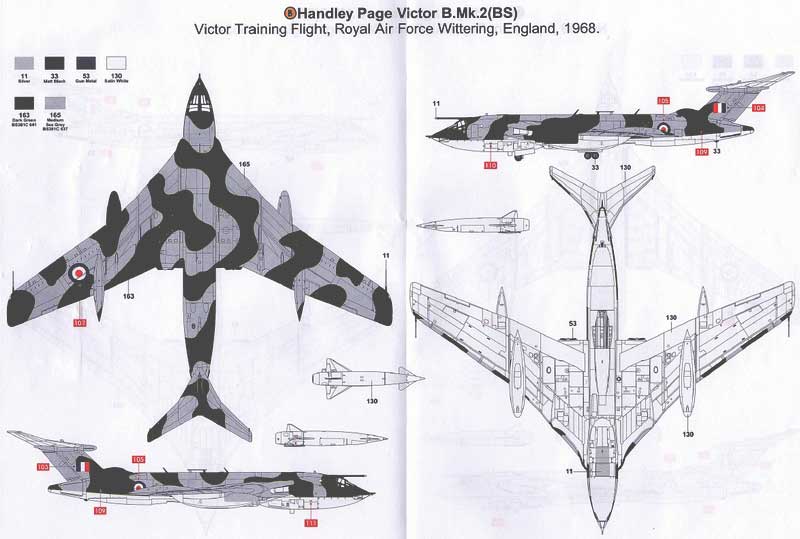
The two schemes of Victors B2 (BS) from the sixties with the Blue Steel missile are:
(a) an all-white "anti-flash" Victor of RAF squadron no.139 ;
(b) a camouflaged Victor of the RAF training flight with white lower surfaces.
The camouflage colours of the latter are correctly identified as BS381C 641 Dark Green and BS381C 637 Medium Sea Grey. (The Humbrol colours are respectively 163 and 165. Acryllics can also be used from Gunze Sangyo with GU330 and GU335). Probably the camouflage edges are "hard" which can be achieved with masking tape. Please note that the camouflage colours extend onto the lower leading edges of the wing, V-tail and air intakes. A masking challenge!

Some suggestions on construction
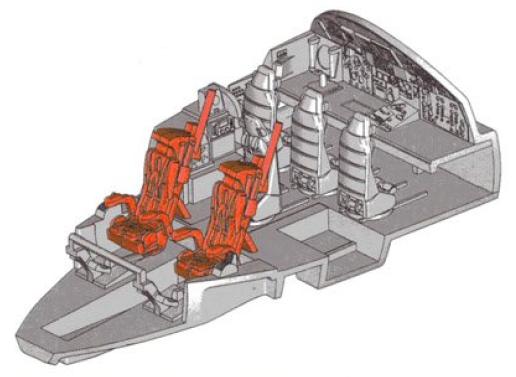
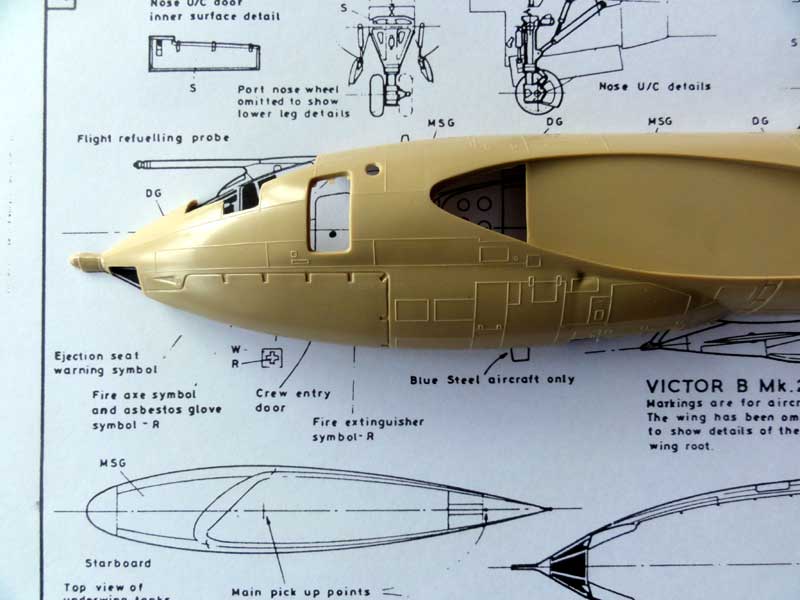
The construction of the Airfix Victor kit starts as usual with the excellent cockpit interior. Boxes, seat, dials and knobs are all there. The two pilot Martin Baker Mk.4 ejection seats may be detailed with some scrap ejection chords on top, these may been seen through the glass work. The four supplied rear seats for the other crew are positioned on a nice detailed floor. Adding home made seat belts of brown and blue tape makes it all complete.

The Airfix drawing in step 54 suggests to make all the inside walls of the cockpit dark grey / black, but most probably the rear wall areas had a "lighter Sky" colour. Many parts of the cockpit interior are also black, it is better to take a lighter “coal black or dark grey” colour and drybrush the details. The pilot instrument panels are mostly seem in black but some were also seen to have medium grey colour with black instrument details. Not a lot of the cockpit interior will be seen later on but it's nice to know it's all there. The port side crew entry door can be set open in this kit.

The instructions also suggest to install the main instruments later as per step 89 but it is better to do this earlier as the fuselage halves are joined. Nice is a separate partno. F18 supplied for the fuselage spine which allows a beautiful finish avoiding sanding off details. Remember in step 68 to open up the holes for the desired antennas for scheme (b).
If you want to build other Victor versions, study photos: a lot is possible with this kit. For example only the B2.(BS) with Blue Steel has the aerial part no.K7 seen in step 116 mounted under the nose.
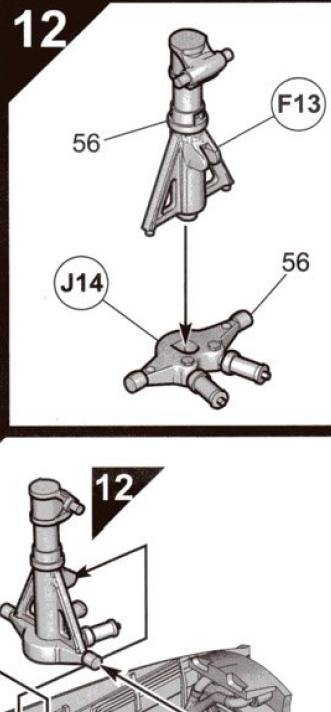
Regarding kit construction, in steps 12-14 it is better to fit the nosewheel leg part F13 later to prevent breaking it off due to handling.
The main undercarriages look great and sufficiently strong. Again, fitting these later on is possible after the application of the primary colours and decals together with the wheel doors. This again avoids handling damage and also a good alignment of all those wheels!
As noted earlier, in steps 17 -20 the horizontal v-stabilizer is shown and some small presumably Radar Warning Receiver antennas need to be removed for the schemes picked in this kit. (this suggests that Airfix may release another version of the kit).

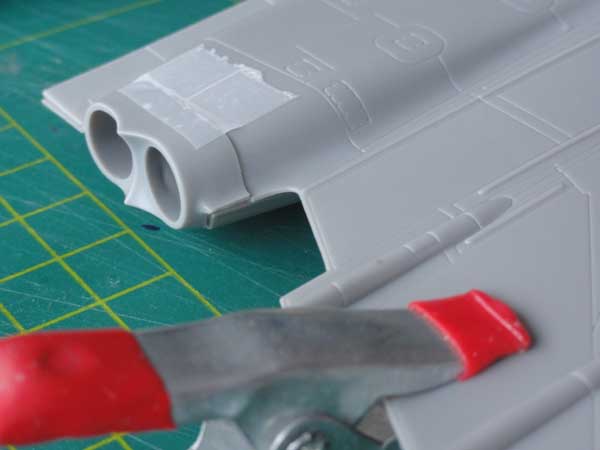
The enormous crescent wing looks fine with a large mid section and separate ends. The internal box structures help to get a solid result. The large air intakes in the wing roots have a smart parts breakdown to avoid seams (which was very difficult on the good old Matchbox Victor). It may be better to do some early painting of the intake edges for the camouflaged paint scheme.
A small omission is that Airfix forgot to indicate that a small auxiliary intake hole needs to be drilled in the left/port side wing leading edge next to the splitter plate for a Victor B2 (left port side wing only).
The four exhaust jet pipes are also pretty deep and they look good. The details are convincing.
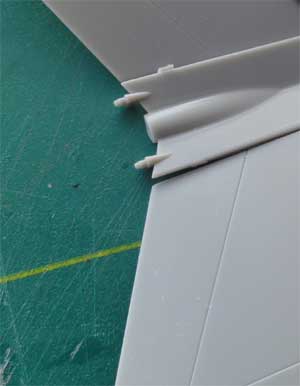
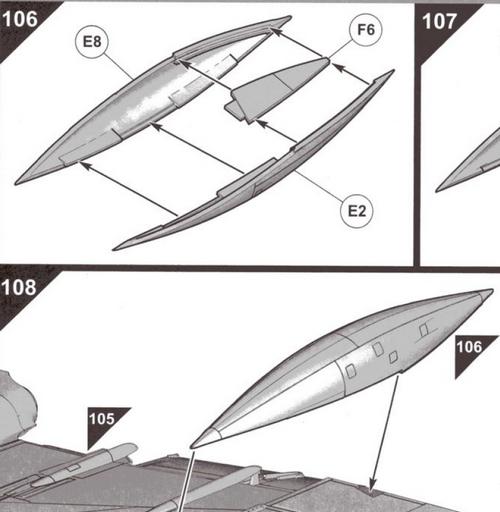
The "Kuchemann carrots" that were fitted on the B.2R are neatly supplied and seen in steps 106-107. In fact, a quick glance suggests that this offers the option to make an early Victor B2 as well by not installing these.

The completion of the kit involves many small bits for various intakes and exhausts and the Victor model looks convincing. An "in flight refuelling" boom is also supplied to be installed above the cockpit. The cockpit entry door can be installed in open position and a ladder is also supplied in the kit. Optionally the prominent Emergency Auxiliary Air Intakes F113 and F114 near the vertical tail can be set open. When set closed, those components are not installed.
 ..
..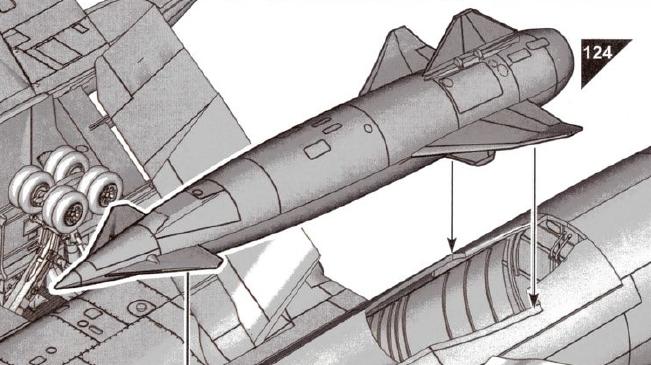
The final steps concern the single Blue Steel missile. The Blue Steel looks good but usually the rocket exhaust was covered with a plate, this can be made from some card. Sometimes seen on photos a sort of supporting rod is seen connected to the Blue Steel nose (this is not in the kit), so check photos. Furthermore, on some Victor B2 (BS) aircraft fitted with Blue Steel often a small intake fairing is positioned on each side of the fuselage. It is situated above the wing root halfway the fuselage side. (Unfortunately no ground dolly is supplied to display the Blue Steel next to the model but surely the aftermarket will follow... ).
The assembly and fit of the model
A rapid model assembly through taping together the main components shows a good fit. The fuselage fits good as well as the larger wing parts. An exception is the fairing part no.K3 for the Blue Steel. There remains a 2 mm wide gap at the rear edge but this can be closed with some card and putty.

Looking at the fit, it is clear that Airfix applied modern 3D engineering and molding techniques. So further model assembly will probably give no problems.
Conclusion:
This is an excellent 1/72 Victor Airfix kit which can provide you with a beautiful model of this V-bomber. The price of 70,- EURO in the shop is almost three times as expensive as the old Matchbox / Revell Victor K2 kit but the result is worth it. The Airfix model with its many parts and complex structure is however not recommended for the beginner but the more experienced builder.
REVIEWERS:
Meindert de Vreeze en Peter Booij ,
Aeronautical design engineers (MSc)
NOTE: A detailed modelling report of Meindert the Vreeze will be published in our IPMS Netherlands "Modelbouw in Plastic" (MIP) magazine in early 2017.
REFERENCES
- Handley Page Victor, door Steve Hazell, Warpaint no.36 , Hall Park publications, 2012;
- Handley Page Victor, door Bob Downey, Warbirds no.35, Arms and Armour Press, 1985;
- Handley Page Victor, door Andrew Brooks, Postwar aircraft no.6, Ian Allan publ., 1988;
- Strategic bomber command, RAF 1950-1968, Guideline publications, 2011;
- Scale Models international, magazine December 1978 with fantastic drawings of mr. A.L. Bentley; (also released in loose packages);
- Scale Models international, magazine November 1983, in the Spotlight Victor B2;
- Scale Aircraft Modelling, magazine April 2003 , Volume 25-2;
- Scale Aviation Modeller, magazine August 2006;
33 = black
52 = blue
53 = burnt metallic
56 = aluminum
62 = brown leather
70 = red-brown
85 = very dark charcoal black
86 = olive
126 = medium grey
130 = white
147 = light
163 = Dark Green BS381C: 641
165 = Medium Sea Grey BS381C: 637
APPENDIX: Dimensions Handley Page Victor B2:
Main measurements made:
Length: Kit 486 mm x 72 = 35.0 meters; Real Victor = 35.07 m so +/- 1 mm so fine;
Wingspan: Kit 508 mm x 72 = 36.58 m; Real Victor = 36.60 m so very good!
It is probable that Airfix will release variations of this Victor kit in the future given the few unused parts in the sprues.
- An early B.2 with the older type intake at the vertical tail base and no Kuchemann carrots fitted below wing trailing edge;
Regarding color schemes there are not very many options. Sometimes RAF squadron badges were seen but not that often!
Only Victor K2 tankers looked very different. For those with less patience... Building this version is possible but requires some but "do able" work. You may use parts from an old Matchbox / Revell Victor K2 in your "modelling stack". Note that the Victor K2 Tanker has shorter wingtips but these can be made. And obviously the tanker pods and the special HDU fairing behind the bomb bay. But may be Airfix will release it in the future, a few extra sparts and they are done!
APPENDIX: Comparison with old Matchbox - Revell Victor K2 kit
We took the liberty to compare the Airfix kit with the old Matchbox kit of the Handley Page Victor K2 (re-released also in the Revell box). And used a whole pile of books and references including the magnificent scale and detail drawings of mr. A. L Bentley (yes, we know you have to be careful with drawings .... But these are exceptionaly good ....)
Well, what have we seen?
 ....
....
 ....
....
Airfix: kit no. A12008 and released December 2016 ;
Details
Airfix: Very good with good engraved panel lines and much more;
Matchbox: Reasonable, only panel lines are not recessed and doubled and must be re-engraved.
Dimensions
Airfix: Within + / - 1 mm;
Matchbox: looks OK, fuselage length OK too; only horizontal v-stabilizer tips needs to be slightly shortened.

Shape:
Airfix: fuselage nose shape looks good;
NOTE: photos are distorted by "parallax". We used our slideruler and our "eye ball mark one"!

Matchbox: forward nose section height 0.5 to 1 mm at lower bottom area too deep but otherwise good shape; small circular window aft of entry door situated a bit too high.
Matchbox: rear section seems to 0.3 - 0.5 mm deep but fine otherwise;
Cockpit Transparancies
Matchbox: front cockpit windows seem 2 mm too short, otherwise good shape


Matchbox: wing root area with rounded curve and shape is too narrow and the height of the entire fairing is too large so that crude exhausts are 3 mm (so 35%) too large in diameter; no separate exhaust pipes

Matchbox: intakes are rough with gaps and difficult filling and sanding is needed on the vanes
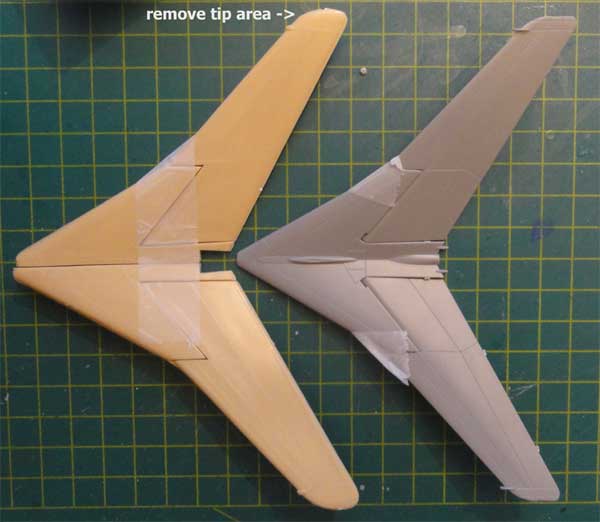
Airfix: wingtips fine for Victor B2;
Matchbox: wingtips fine for Victor K2 tanker (less span)
Airfix: wing vortex generators numbers 2 x 23 and also in correct position;
Matchbox: also numbers 2 x 23 and also in correct position
Airfix: wing ailerons are OK but upright trim tabs (not clear why this is molded that way);
Matchbox: ailerons also correct with appropriate K2 tanker wing tips
Undercarriage
Matchbox: undercarriage is correct but a bit crude but with correct wheel diameters and good wheel hubs
Tail sections
Matchbox: V-stabilizer has correct shape but stabilzer span too large as the tips extend 3 mm to much on each side. Sanding off corrects this (minus 2x3 = 6 mm) ; leading edge sweep a bit off but acceptable.
 .
. 
Air brakes
Airfix: air brakes neat and can be set opened or closed. Open up lighting holes in part G17 by drilling;
Matchbox: air brakes which can be set opened or closed. Decent but the shape of the upper lip of each brake should be made a bit more triangular through sanding
Other..
Airfix: Blue Steel missile is neat and looks of correct dimensions (this missile in the old Airfix Avro Vulcan is 5 mm too short);
Matchbox: for K2 tanker no Blue Steel relevant, nice are the additional tank pods in this kit though a bit crude.
Conclusion: the old Matchbox kit in 1983 was not bad at all!
You can check out Meindert's Matchbox kit Victor conversion made 15 years ago at his personal page here: https://designer.home.xs4all.nl/models/victor/victor.htm
REVIEWERS:
Meindert de Vreeze en Peter Booij
IPMS Nederland
![]() OPMERKING: lezers kunnen hier onze Nederlandstalige recensie lezen hier...
OPMERKING: lezers kunnen hier onze Nederlandstalige recensie lezen hier...
![]() OUR SERVICE:
OUR SERVICE:
DOWNLOAD WITH FULL PICTURES Airfix-HP-Victor-ENGLISH-LETTERsize.pdf (LETTER SIZED PAPER 28 PAGES)
DOWNLOAD PDF WITHOUT PICTURES Airfix-HP-Victor-ENGLISH-nopics.pdf (LETTER SIZED about 9 pages)
This page was first published on this IPMS Nederland website December 20th, 2016. IPMS: For modellers, by modellers! Enjoy modelling!