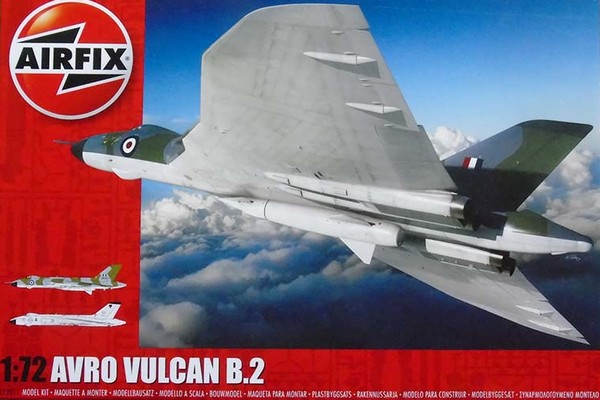
Building the Airfix Vulcan model
Model: Avro Vulcan B.2
Brand: Airfix
Scale: 1/72
Kitno: A12011
Number of parts: about 277
Price NL: about 70 Euro
By Gerlof Dijkstra
I already made an article in Dutch language with my first impression of the new Airfix Vulcan B2 1:72. Here I would like to share some findings when building the kit. But first...
About the real Vulcan
I first saw the Vulcan on an Open Day of the Dutch Air Force at Deelen airport in 1978 (65 years Royal Dutch Air Force). In my memory it flew a few times from left to right, I still have a picture of it taken with an analog camera. It shows a lot of air and a very small Vulcan! In 2018 I visited the RAF museum Hendon where I could admire the Vulcan. The entire hall is built around the Vulcan so to make a picture of the complete Vulcan was not possible (for me). But it gives a good impression of the large size of the Vulcan. To both sides and under the Vulcan are not only the weapons but also cars form the same period the Vulcan was built. This gives a good indication of how futuristic the design of the Vulcan is. The cars look very dated but the Vulcan still looks pretty and impressive and not at all dated. But the inside of the Vulcan originated from the 50’s or earlier. De radar used to find the right location to drop the bombs was a modified version of the H2S version of the 2nd World War. The ECM equipment was kept more or less up to date but was focused on the radars used by the Warsaw pact. During the final years the Vulcan was in active service there was little money invested to keep it up to date.
But then Argentina invaded in 1982 the Falklands. And resources had to be found to do something against this. The RAF thought about bombing. A lot of calculating had to be done to see which plane was suitable. A huge distance had to be flown (6.300 km one way) from a small island (Ascension) in the Atlantic Ocean. After it was decided it was possible the refuelling probes of the Vulcan had to be reactivated. These probes were deactivated in the 60’s after some accidents during refuelling. Next the crew had to be trained to execute the refuelling safely. Eventually all flights to the Falklands carried an extra crewmember (pilot) to ensure safe refuelling. Then there was also the issue with the 1.000lb bombs. Stocks of these bombs were getting low. There were only a few available to train with. The final challenge was to navigate across the ocean. The navigation systems installed in the Vulcan were not designed for this. So other navigation systems had to be installed, rather hastily.
The Argentine ECM system for AA systems mainly was not based on the technology of the Warsaw pact but on modern western systems. Quick action had to be taken to mount an American ECM pod beneath the Vulcan. The location was the same as where some Vulcans were prepared for the Skybolt ASM. After some searching the exact location on the wing was found. So, the Vulcans used for the Black Buck raids had these provisions and were equipped with the strongest version of the Olympus engines for better take off performance with the overload of fuel, bombs and people on board. These flights of 15 hours in a small cockpit where one pilot had no seat for most of the flight. They needed 3 pilots but the 2nd pilot was only on its seat during the actual attack. I don’t think it was much fun sitting there for so long. But it is quite an achievement for the crew to drop the bombs at the correct place after such a long flight. Thanks to the enthusiastic British public one Vulcan was kept flying for a long time by the RAF. When this was not affordable anymore this plane was grounded. After a few years a trust fund was set up with support from the aircraft industry to get this aircraft back in to the skies (Vulcan to the sky). When the support from the aircraft companies discontinued the Vulcan could not be kept flying. This Vulcan now stands at Doncaster Sheffield airport. I just read the planned build of a dedicated hanger for the Vulcan is abandoned because of lack of money.
Back to the Airfix kit A12011
In the past (1983) Airfix had released a kit of the Vulcan in 1:72 scale. But after the release of the Valiant and Victor Airfix found it wise to make a brand-new Vulcan. In this kit A12011 there no parts common with the older release. There is only one sprue that is also in the Airfix Victor kit which is the sprue for the Blue Steel ASM.
Airfix has digitally recorded the Vulcan that is on display at the Newark Air Museum. For specific issues I had with building the kit I include a separate table below this article.
The parts give a good impression. I think there will more releases from Airfix for different versions of the Vulcan. The topside of the rudder has options for the improved ECM equipment. There also 4 options for the nose. The original one, the one with refuelling probe, the version with TFR and the last one, TFR with refuelling probe. There also longer exhaust for the engines. For this first release of the kit Airfix includes markings for two options. Option 1 is of the 12th squadron Coningsby 1963 all-in white, option 2 is camouflaged one from the Scampton Wing, Scampton 1966. I chose the last version because it thought it was more colourful. There are 2 options for the bomb bay, the first one (12th squadron) with bomb bay (open or closed) with the 1.000 lbs bombs visible. The 2nd option is with the Blue Streak ASM missile (Scampton wing).
There is also the option to build the kit with open airbrakes and two covers for the air intakes are also included. I suspect, a lot of decal options will be appearing. Maybe they are already available.
About the decals
Take enough time because there are a lot of them. If I counted correctly there are 155 for the Scampton wing version. The kit decals are of good quality. There a lot of stencilling decals to place. I needed in total 4 hours to place them all. One thing struck me during the placing of the decals: the backing paper of the decals has a blueish colour. Some decals are difficult to find on the sheet, one can see the number but the decal itself can be almost totally invisible. When putting the decals in the water the backing paper lightens up and the invisible decals become visible. Unfortunately some other decals then become invisible. That is why I did not fit the decals on the undercarriage, I couldn’t find the tiny invisible decals anymore.
Building
By the way the Vulcan is designed by Airfix one can work on the cockpit and the wings (with bomb bay) at the same time. A very good extra is the extra closed in bay in front of the cockpit for the weight to keep the Vulcan from being a tail sitter. The fit is generally good, but it is not as good as Tamiya (yet). The big parts (wings) seem to have a slight distortion. After fitting everything inside the wing doesn’t fit 100 % (more like 99,5 %). But in comparison to older Airfix kits (I worked at the same time on the 1:24 Harrier) there is a gigantic improvement. But to get to the top Airfix has to put more attention to small details during the manufacturing (for example small differences in temperature) to avoid the distortions. For me it is unclear why some parts fit perfectly (need no glue) and the fit other parts is to loose they can lead to later fitting issues. For the exhaust there is nice touch that Airfix provides a jig for correct alignment, I did not find it useful but some might think otherwise.
The only detail Airfix missed are the outriggers for the crew hatch. I added these from thin copper wire. A discussion point can be the instrument consoles for the navigators and bomb aimer that are not detailed. Curiously in the Airfix Victor kit these are detailed. But on the finished model one can see nothing of it so I left it as made by Airfix.
Probably caused by financial reasons Airfix didn’t use a sliding mould for the air intakes. They are now split in a top and bottom which leads to a small gap after gluing that takes lots of effort to make it right. I suspect aftermarket items will become available for the intake and the instrument consoles for the navigators.
I choose paints from Humbrol and Revell. About the quality of these paints I have some complaints. The Humbrol covers up very badly, needing on average at least 3 layers to cover well. And after these layers the paint on the model is quite thick. With the Revell paints (with never the same colour range of grey) the silk matt black had to be thinned to such an extent that the end result was matt. So here an urgent request to these 2 brands to match the quality of the kits of recent Revell and Airfix issues. Otherwise, It will stop people of building a 2nd kit when starting our beautiful hobby.
Before I forget there is one disadvantage with the kit which is caused by the original design (1:1)..... With most planes there is a fuselage to hold when painting or working on the model. The Vulcan is more or less only a wing with less surface to hold on to. The rudder is one item but because of the weight of the model I found it tricky to hold it there, being afraid to break it off. I broke twice broke the aerial on the front undercarriage door. So, think before lifting the model. And yes, it is a BIG model needing a big display cabinet to store it dust free. Regretfully my 2 new display cabinets didn’t fit the Vulcan in, so it now rests on top of one.
The big question is the kit worth the money. In comparison to the previous old Airfix kit it is a huge improvement in detailing and fit. And if one wants to complete the V bomber collection one needs this model. And with every other kit the question is what do you want to spend (i.e. how big is your budget). And if one wants the kit there is always a reason to justify the money (to your partner). And in comparison to the Harrier 1:24 probably in the same price range as the Vulcan it is definitely worth the money.
SUGGESTIONS per step

TIP: check out the IPMS NL Walkaround Avro Vulcan
this report was published May 2022 on this IPMS Nederland website


